Showing posts with label technique. Show all posts

Friday, September 10, 2010

Baking (Photo Tutorial)

 (This post is the 5th in a 5-part series of photo tutorial instructions.  To see the original recipe, click here.)

After the loaf is scored, it is ready to bake.  

Start with the oven set to 400 ℉.  Place the baking sheet in the oven, and set the timer for 10 minutes.  Using a water spray-bottle, spray the sides of the oven (and the loaf itself) with water.  It may also be helpful to put ice cubes into the bottom of the oven.  (These will melt and produce steam which increases the oven rise).

Next, lower the temperature to 375 ℉ and cook 25 minutes longer.
Last, turn off the oven with the loaf inside.  Let it sit this way for 10 minutes.  This will keep the crust from getting soggy as the trapped moisture in the bread continues to escape.  (If you don't like your bread crusty, feel free to skip this step!)

You now have the all the expertise you need to make your own fancy loaf!

Thursday, September 9, 2010

Dough Shaping (Photo Tutorial)

(This post is the 4th in a 5-part series of photo tutorial instructions.  To see the original recipe, click here.)

After kneading is complete, cover and let rise in a warm place for about 30 minutes.

When the dough is doubled in size, it is ready to shape.

Preshape, and roll out into a rectangle.

Roll up the loaf, pinching all of the seams closed.  

Roll gently to elongate and set the seams.  Place on a baking sheet (seam-side down).  Spray lightly with cooking spray, and cover with plastic wrap. 

Let rise for about 30 minutes, or until almost double in size.

Cut diagonal slashes in the top using a very sharp knife or razorblade.

Now you are ready to bake the loaf.

Wednesday, September 8, 2010

Dough Kneading (Photo Tutorial)

(This post is the 3rd in a 5-part series of photo tutorial instructions.  To see the original recipe, click here.)

After mixing the dough, you are ready to knead it.

Before kneading
To knead, fold the dough in half, rotating 1/4 turn to the right every time.
Continue this process until the dough is smooth. 

Helpful hints:
1.  If the dough is too sticky, add more flour.
2. If the the dough is too stiff, let it rest for 5 or 10 minutes before continuing.

After kneading
Now you are ready to let the dough rise.

Tuesday, September 7, 2010

Dough Mixing (Photo Tutorial)

(This post is the 2nd in a 5-part series of photo tutorial instructions.  See the original recipe here.)
 
Mix the wet ingredients in a microwave-safe dish and microwave for 30-60 seconds.

Mix dry ingredients separately.
 

Place preheated wet ingredients in the bottom of a mixer bowl.

Add the dry ingredients on top.

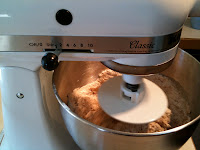
Mix for about 2 minutes, until the dough has pulled away from the sides of the bowl.  You may use a spatula to help scrape the sides to get all of the flour incorporated.  If the dough is too sticky, you may add extra flour to help the dough stop sticking to the bowl.


Turn out onto a lightly floured surface.

Now you are ready to knead the dough.