Wednesday, September 29, 2010

Cheesy Corn Bread

With the weather getting cooler, chili and chowder season is right around the corner.  This has prompted me to start working on a corn bread recipe.  While I've never shredded cheese over the top of a loaf before, the idea seemed sound.  (After all, there are a lot of commercially available breads that have cheese on them.)


I think I'll probably play around with this some more, but the resulting loaf was good enough to serve to friends (and get several compliments).  If you want to try this yourself, be sure to grease your loaf pan well so that the cheese doesn't cement the loaf into the pan. <wink, wink>
Cheesy Corn Bread

2 Tbsp. canola oil
2 Tbsp. honey
1 1/4 c. water
2 eggs, beaten
3 c. white bread flour
1/2 c. corn flour
1/2 c. cornmeal
1/2 Tbsp. salt
1/2 Tbsp. yeast
1/2 oz. sharp cheddar cheese, grated

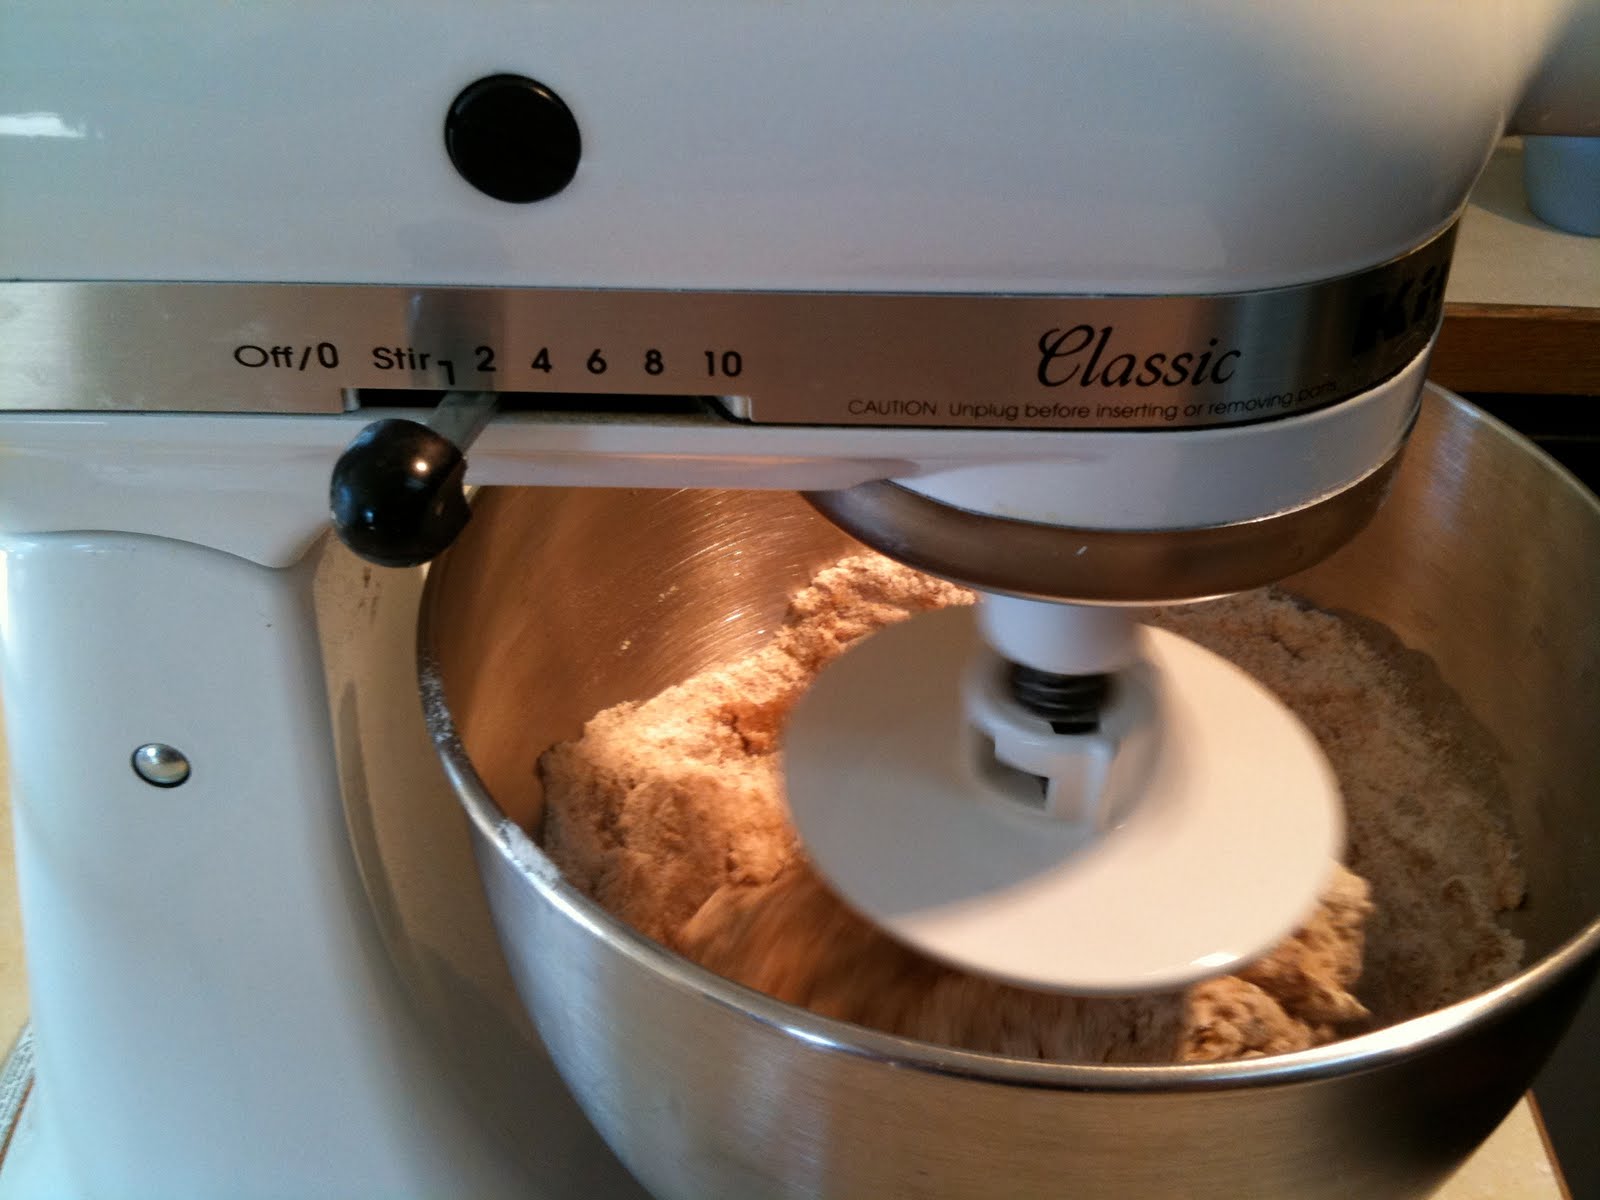
Beat the eggs and combine with the remaining wet ingredients in the bottom of a mixer bowl.  Combine the dry ingredients separately and add to the the mixer bowl.  Mix on low until all of the dry ingredients have been incorporated and the dough balls up on the dough hook.  The dough will be very soft.  Knead gently on a lightly floured surface until the dough is smooth, then let it rest for 10 minutes.  Knead gently a second time to build up the strength of the dough, then let it rise for 45 minutes, or until about doubled in size.  Shape the dough into a loaf, place it into a greased loaf pan, and allow it to rise a second time.  Spray the loaf with water and sprinkle the grated cheese over the top before baking.  Bake at 375 °F for 35 minutes, then turn the oven off and let the bread remain inside for 10 minutes more.  Slice after cooling.


I find myself wondering if some actual corn kernels would be good in this?  Or perhaps green chilies?  Any opinions out there?

Monday, September 27, 2010

Where's the Butter?


Have you ever noticed how easy it is to lie (or at least not tell the whole truth) when you are eating something that someone else has made?  How many times have you told someone that you thought their cooking was great when it really wasn't?

I've certainly found myself in this predicament.  You know how it goes: you don't want to hurt someone's feelings, or you know that they tried really hard, or you trust that their intentions were good... and so on and so forth.  But, it's not so nice when you're on the receiving end of hollow compliments.  Now that I'm making bread on a pretty regular basis, I really want to get good at this.  And, I really want people to genuinely like what I make.  I need to know what people honestly think.

That's why I got pretty excited when somebody told me last week,
"Hey, this bread is the real thing isn't it!  But, I gotta offer you some constructive criticism:  Where's the butter?" 
I don't actually put butter on my bread very often, and as a result, I don't always provide butter with my bread when I take it places.   But after this encounter, I think that's something that's going to change.  Not only will it make my bread more enjoyable for others, but it's also a good opportunity to practice humbly accepting criticism and seeing things from somebody else's perspective.  That's an important skill for someone who aspires to put their creative energy into the public arena.  Friends and family may mince words, but editors probably don't.

As an interesting side note: a new bakery is opening in Fort Collins.  The name?  Butter: A Bakery  (not to be confused with the Buttercream Cupcakery).  Check out the recent press here.

Friday, September 24, 2010

Triple Chocolate Loaf


This is bread is the happy marriage of gooey, melted chocolate and hot, fresh bread.  I have a hard time imagining a situation in which this bread could do you wrong...

Triple Chocolate Bread
(modified from Jennie Shapter's Bread Machine cookbook)
 
2 Tbsp. butter
1 2/3 c. cool water
1 egg, beaten
3 c. white bread flour
1 c. whole wheat flour
1 Tbsp. sugar
1 tsp. salt
1 1/2 tsp. yeast
2 oz. each: milk chocolate, dark chocolate with orange, and fruit & nut chocolate (feel free to substitute your own preferred flavors!)

Melt the butter in a microwave-safe dish.  Mix with the cool water and place in the bottom of the mixer bowl.  Beat the egg and add to the wet ingredients.  Premix the dry ingredients (except for the chocolate) in a separate bowl.  Add to the top of the mixer bowl.  Mix the dough.  Turn out onto a floured surface and knead until smooth.  Allow to rise for 30 minutes.  Punch the dough down and roll into a rectangle.  Coarsely chop the chocolate and sprinkle over the dough.  Then, roll up the loaf, sealing all of the sides.  Place in a greased bread pan and let rise for 30 minutes.  Bake at 400 °F for 10 minutes, then 375 °F for 25 minutes.  Finally, turn the oven off, and let the bread sit inside for an additional 10 minutes.  Brush the top of the loaf with butter and allow to cool before slicing.

Wednesday, September 22, 2010

Crescent Rolls

This weekend, I decided to recreate some crescent rolls that my Mom used to make for various family functions.  In spite of a few setbacks, I am pretty satisfied with the results.  Not only are the rolls pretty, but if you are serving them to a group of people, there is no need to deal with the mess of sliced bread.

Crescent Rolls
Prepare one recipe of Easy White Bread dough.  After the bulk dough is done rising, it is ready to shape into rolls. 

To make the rolls, divide the dough in half.  For one half, use a rolling pin to roll the dough into a circle.  Slice into eighths; then roll out each slice a little bit longer. Spray lightly with cooking spray, then starting at the wide end, roll up the slice into a crescent shape.  Place the rolls on a lightly greased cooking sheet and then mist the tops with cooking spray.  Repeat with the second half of the dough.

  Let rolls rise for 30 minutes.  Bake at 400 for 10 minutes, then rotate the pan and bake at 375 for 10 minutes more.  Cool on a wire rack.

Monday, September 20, 2010

Warning: Amatour at Work

I think today is a good day to remind you (or me?) that I am not a professional. 


Although I may spend hours typing these posts and trying to get the best angle photographs with my *fancy* camera, I'm really just an everyday person who likes to make bread.  The upshot of this is that sometimes I royally biff it. 

Generally, I would try to shield you from examples.  But, seeing as I was talking with a coworker recently about the importance of making and learning from mistakes, I'm going to indulge you.

I made crescent rolls Saturday.  I carefully mixed the dough and let it rise.  I divided it and shaped it into 16 lovely rolls.  I preheated the oven and put the rolls inside.  And then, in a moment of sheer absent-minded, un-brilliance: I turned off the oven.  WHY?  WHY? (The question is still ringing in my ears.)  

When I discovered my mistake 10 minutes later, I turned the oven back on, but it was to late.  Baking while preheating only results in rolls that are lightly browned on top and burned black as soot on the bottom.


The worst part is that I was doing all of this so that I could take said rolls with me to an event where I might garner some publicity for Loafin' Around.  *sigh*  Sometimes things just don't work out quite like you imagined.

Friday, September 17, 2010

Kale Problem? Kale Solution!

Kale. (Photo courtesy of PioneerValleyGirl)

This summer, Flourboy and I have been participating in a CSA.  Enjoying the farm-fresh bounty of summer (without having to personally farm anything) has been a real treat!  But, it has also resulted in multiple batches of kale, collard greens, and swiss chard cluttering up the lower half of our fridge.  Don't get me wrong: I like a good batch of steamed greens.  It's just that that only gets you so far when you're getting this stuff week after week after week.  We tried kale chips.  We were not impressed.  (purported to be like potato chips... really??? Those are NOT like any brand of potato chips that I'm familiar with.)

So, I came up with a better use for all those greens:


My Mom used to make spinach dip and serve it in a bread bowl.  Kale is similar to spinach, and it turns out that it works great in this dip!

Kale Dip:
1. Coarsely chop and cook a large batch of kale.  
2. Chop it finely using a food processor.
3. Follow the Mrs. Grass Spinach Dip recipe, substituting the chopped kale for the frozen spinach.

Wheat Sourdough Bread Bowl:
1. Make the Firm.  Mix 2 c. Sourdough Starter with 2 c. white bread flour.  Knead until smooth.  Let rise at room temperature for 8 hours.  Then punch down, knead, and refrigerate until you are ready to make the dough (within 12-24 hours).
2. Make the Dough.  Mix the Firm (chopped into several pieces), 4 c. white bread flour, 2 c. whole wheat flour, 1 Tbsp. salt, 1 tsp. sugar, and 2 c. cool water.  Knead until smooth and elastic.  Let rise in the fridge 8 hours (or overnight; until about doubled in bulk.)
3. Divide the dough into 3 pieces.  Shape into round loaves.  Let rise in the fridge for 8 hours (or until almost doubled).
4. Let the dough come to room temperature (about 1 hour) before baking. Bake at 400 for 10 minutes, then 375 for 25 minutes more.  Turn off the oven and let the loaves sit inside for 10 minutes more.
5. Cool completely before cutting a square out of the top and tearing out the inside of the loaf.

The last part is obvious...  put the dip inside the bread bowl and serve it up!  This snack definitely got great reviews in the lab!  Need to make an appetizer for your next football party?  Try it out!

Monday, September 13, 2010

Useful Gadgets: The Dough Scraper


Among my favorite kitchen gadgets is the dough scraper.  Flourboy (who has actually worked in a real, honest-to-goodness bakery) insisted that it was a tool that I shouldn't live without.  Some folks think that the stiff, stainless steel scraper is better, but I really appreciate the flexibility of this plastic one.  It can be used to scrape all kinds of surfaces clean or to cut dough into smaller pieces.  I also like that I don't have to worry about it scratching the counter top.
If you have ever experienced the epic fail of trying to wipe up excess flour or residual dough with a sponge (which only results in the flour-goo mummification of said sponge), then this is the tool for you!

Friday, September 10, 2010

Baking (Photo Tutorial)

 (This post is the 5th in a 5-part series of photo tutorial instructions.  To see the original recipe, click here.)

After the loaf is scored, it is ready to bake.  

Start with the oven set to 400 ℉.  Place the baking sheet in the oven, and set the timer for 10 minutes.  Using a water spray-bottle, spray the sides of the oven (and the loaf itself) with water.  It may also be helpful to put ice cubes into the bottom of the oven.  (These will melt and produce steam which increases the oven rise).

Next, lower the temperature to 375 ℉ and cook 25 minutes longer.
Last, turn off the oven with the loaf inside.  Let it sit this way for 10 minutes.  This will keep the crust from getting soggy as the trapped moisture in the bread continues to escape.  (If you don't like your bread crusty, feel free to skip this step!)

You now have the all the expertise you need to make your own fancy loaf!

Thursday, September 9, 2010

Dough Shaping (Photo Tutorial)

(This post is the 4th in a 5-part series of photo tutorial instructions.  To see the original recipe, click here.)

After kneading is complete, cover and let rise in a warm place for about 30 minutes.

When the dough is doubled in size, it is ready to shape.

Preshape, and roll out into a rectangle.

Roll up the loaf, pinching all of the seams closed.  

Roll gently to elongate and set the seams.  Place on a baking sheet (seam-side down).  Spray lightly with cooking spray, and cover with plastic wrap. 

Let rise for about 30 minutes, or until almost double in size.

Cut diagonal slashes in the top using a very sharp knife or razorblade.

Now you are ready to bake the loaf.

Wednesday, September 8, 2010

Dough Kneading (Photo Tutorial)

(This post is the 3rd in a 5-part series of photo tutorial instructions.  To see the original recipe, click here.)

After mixing the dough, you are ready to knead it.

Before kneading
To knead, fold the dough in half, rotating 1/4 turn to the right every time.
Continue this process until the dough is smooth. 

Helpful hints:
1.  If the dough is too sticky, add more flour.
2. If the the dough is too stiff, let it rest for 5 or 10 minutes before continuing.

After kneading
Now you are ready to let the dough rise.

Tuesday, September 7, 2010

Dough Mixing (Photo Tutorial)

(This post is the 2nd in a 5-part series of photo tutorial instructions.  See the original recipe here.)
 
Mix the wet ingredients in a microwave-safe dish and microwave for 30-60 seconds.

Mix dry ingredients separately.
 

Place preheated wet ingredients in the bottom of a mixer bowl.

Add the dry ingredients on top.

Mix for about 2 minutes, until the dough has pulled away from the sides of the bowl.  You may use a spatula to help scrape the sides to get all of the flour incorporated.  If the dough is too sticky, you may add extra flour to help the dough stop sticking to the bowl.


Turn out onto a lightly floured surface.

Now you are ready to knead the dough.

Monday, September 6, 2010

Wheat Bread Photo Tutorial


I know that many people really enjoy having pictures to accompany instructions in a recipe, so I thought I would do a series of posts this week that describe in detail--and in pictures--all of the steps for making this whole wheat loaf.  This is the basic recipe, and there will be more detailed instructions embedded in the text over the next several days.

Whole Wheat Bread

3 Tbsp. oil
+ water to equal 2 cups wet ingredients

2 c. whole wheat flour
2 c. white bread flour
1 1/2 tsp. salt
1 1/2 tsp. yeast
3 tsp. sugar

Mix the wet ingredients in a microwave-safe dish and microwave for 45 seconds.  Mix dry ingredients separately.  Place preheated wet ingredients in the bottom of a mixer bowl and add the dry ingredients on top.  Mix for 2 minutes, until the dough has pulled away from the sides of the bowl.  Turn out onto a lightly floured surface and knead until smooth.  Before shaping, cover and let rise in a warm place for 30 minutes.  When dough is doubled in size, punch down and roll out into a rectangle.  Roll up the loaf, pinching all of the seams closed.  Let rise for another 30 minutes.  Cut diagonal slashes in the top.  Bake for 10 minutes at 400 ℉, then reduce the temperature to 375 ℉ and cook 25 minutes longer.  Turn off the oven and let sit in the oven for 10 minutes more.  Cool before slicing.

Friday, September 3, 2010

Nothing Says Fresh Bread like "Fresh Bread"

Fresh Bread!
Seriously.  My Mother-in-law bought this for me, and I squeeled like a little girl at Christmas when I got it.  SQUEEEeeeee!

I am convinced that one can never really have enough bread bags.  or baskets.  or napkin-wrappy-things.  Besides, being fun, the way you present your creations can really affect what people think.

I like the message that this bag sends: Fresh Bread.

Oh, and the spiral, wafting, hot-bread smell thing is a pretty nice touch too.

Wednesday, September 1, 2010

Seven Days of (Sourdough) Creation

 In the beginning there was flour and water (with a little bit of malt and honey), and the sourdough starter was a formless mass.  The baker hovered over it and thought, "please let there be yeast!" and she hoped that it would be good.  There was darkness and light.  Together these made up the first day.

Then the baker saw that there were layers in the starter.  But she paid no attention.  She mixed in extra malt and honey with flour and water.  And she thought it could be good.  All this happened on the second day.

Then the baker saw that there were bubbles in the starter.  Carbon dioxide!  She knew that this was good, mixed in more flour and water... and then transferred the starter to a bigger bowl... on the third day.

At this time the bowl was teeming with all kinds of life.  The baker threw out half of the starter and added more fresh flour and water.  This completed the fourth day.

Then the baker saw that the instructions called for the addition of more flour and water.  She blinked twice in disbelief, then added it.  The bowl was overflowing with starter on the fifth day.  She put it in the refrigerator overnight.

Then the baker saw that it was time to make the firm.  She mixed 2 cups of unbleached bread flour with 2 cups of sourdough starter (and a small sprinkling of water to help it pull together).  She kneaded the mass until it formed a smooth dough and left it to rise for 8 hours at room temperature.  She stored it in the refrigerator overnight.  And she began to feel very tired on the sixth day.

In the morning, with the firm in hand, the baker set out to make sourdough.  She mixed the firm with 6 cups of unbleached bread four, 1 Tbsp. salt, 1 1/4 tsp. malt, and 2 cups of cool water.  She kneaded the dough.  And kneaded and kneaded.  Longer than ever before.  And tried unsuccessfully to replicate the windowpane test, so kneaded some more.  Then she let the dough rise for 6 hours (instead of 4, because she went fishing and lost track of time).  She punched the dough down and shaped it into three loaves and let them rise for 3 hours.  She fretted that they would not turn out and decided to bake two loaves that night (instead of putting them in the refrigerator until morning).   She scored the loaves and baked them, steaming them for maximum crustiness.

Then she pulled them out of the oven.  And as they were cooling she heard the most magnificent sound ever: crackling.  The bread was singing on its cooling rack!  She was pleased with her creation and saw that it was good.

So the creation of the starter and the firm and the loaves was completed.  And on the seventh day, having completed her task, the baker collapsed into bed, exhausted.  (Of course, she also got up early on the eighth day to cook the last loaf, but that's not really important in the end.)

This is the account of the creation of sourdough.